
Managing Sites
The eMabler platform offers a flexible system for organizing EV chargers using Groups, i.e., Sites (physical locations). This guide is designed to help customers understand, structure, and manage their assets for better control, visibility, and scalability.
1. What Are Sites?
Sites are physical locations or business units where chargers are deployed. Sites allow you to group chargers or subsites to match your organizational or business needs.
Chargers must always be linked to a Site.
2. Designing Your Site Structure
Minimal Recommended Site Structure
The first level of the hierarchy is used to host billing information and provide site managers access to manage their own locations.

Best for: Small networks or simple operations with direct site-to-charger mapping.
Each location has its own group of chargers and autonomous control.
Example: Site Structure with Sub-CPOs
For more complex environments involving sub-organizations (like subcontracted operators or investors), use a multi-tier structure.
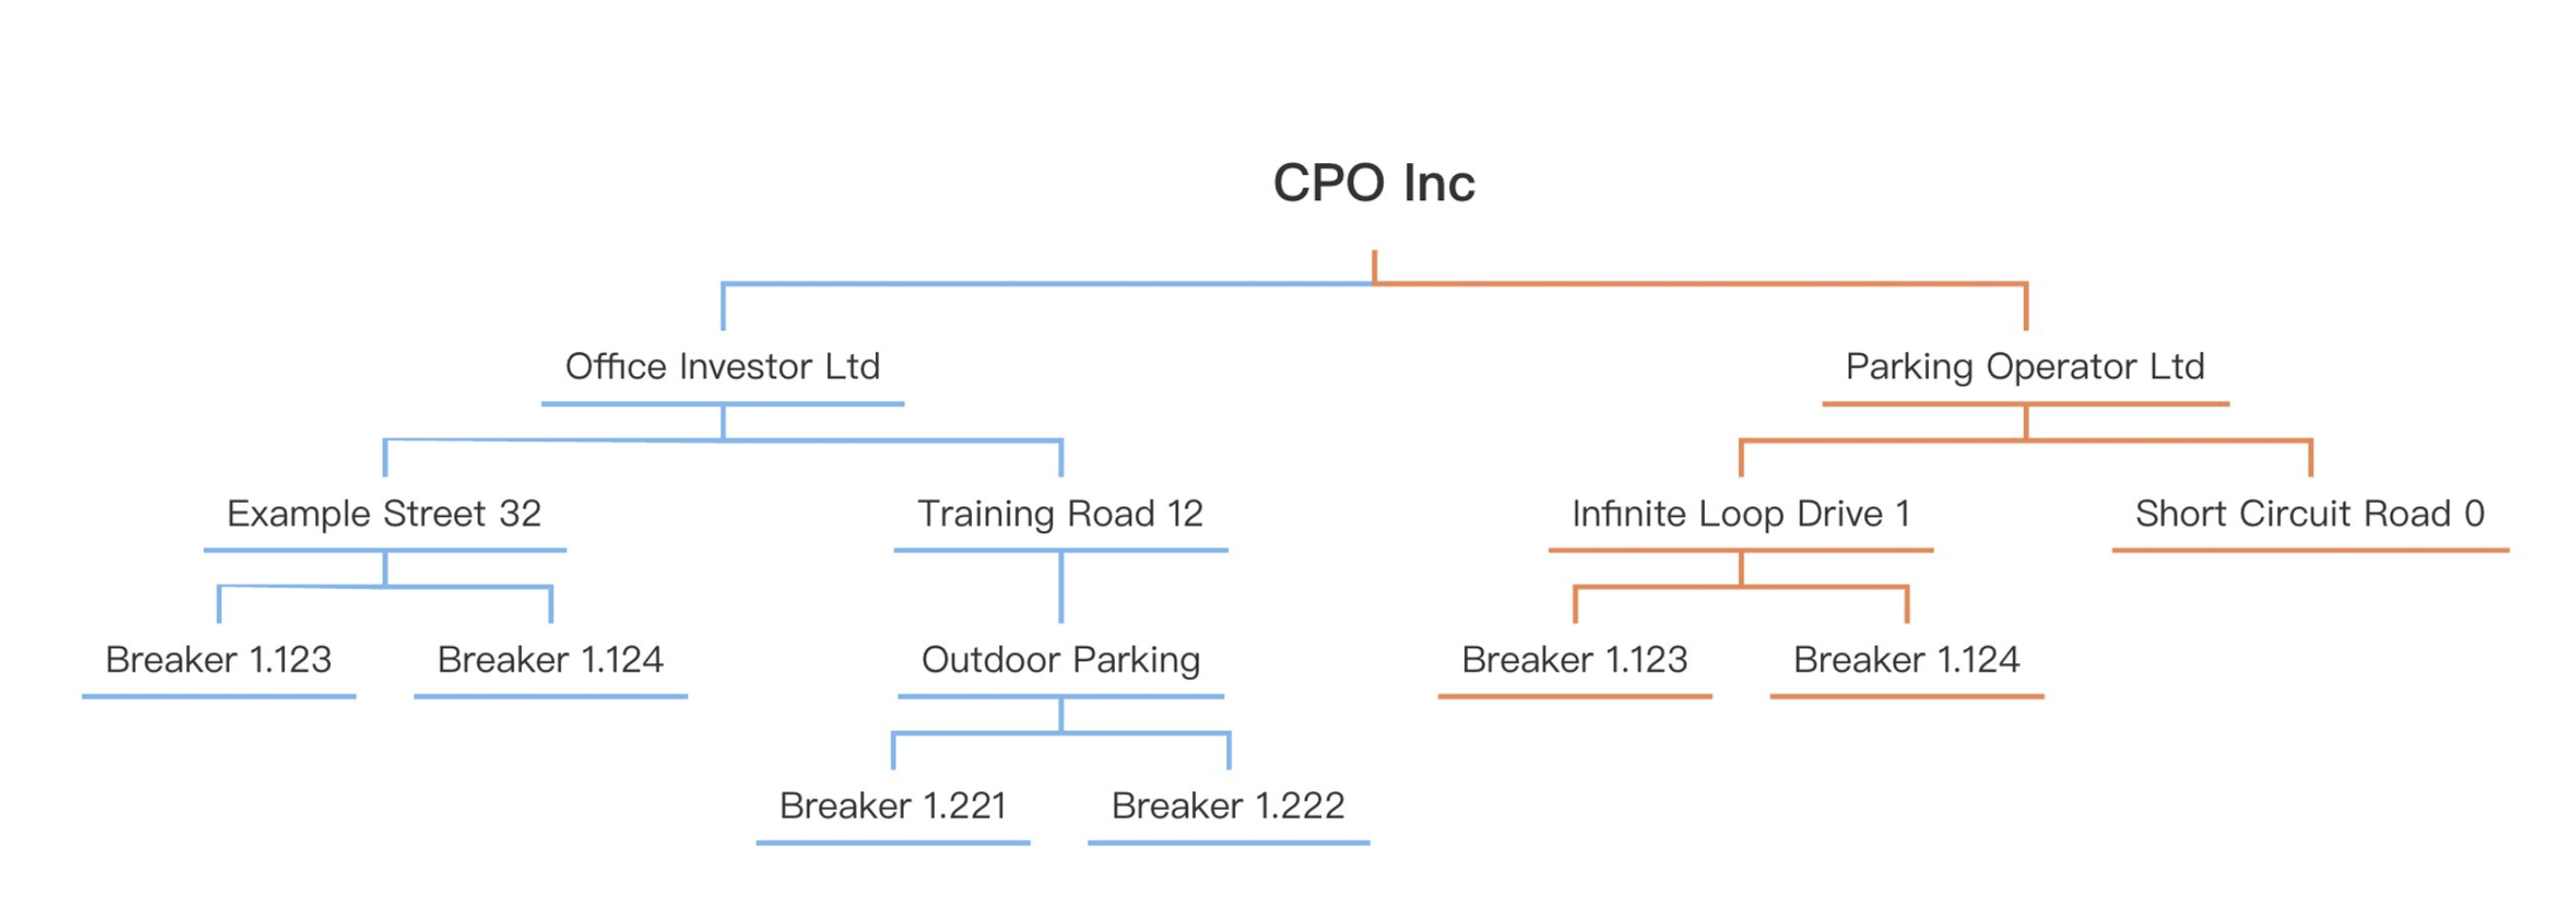
Best for: National operators, infrastructure owners, or real estate firms managing multiple tenants.
3. Creating a Site
To create a new Site:
Navigate to the Sites tab.
Click Add ➝ Site.
Fill in:
Site Name (required)
Parent Site (optional, for nesting)
Address: Street, City, Postal code, Country
Location: Set coordinates on the map
Time Zone: This is mandatory if you want to have local timestamps for transactions or if you are using spot prices in transaction cost calculation
Public/Private access flag
Click Save
4. Editing Site Details
Select a Site.
Click Edit.
Update fields such as:
Field | Description |
|---|---|
Site Name | Label for internal display |
Parent Site | Assign hierarchy (if any) |
Public Name | Shown to users or in reports |
External ID | Optional integration tag |
Site Type | Choose based on implementation |
Parking Type | Optional classification (e.g., Garage, Open lot) |
Save changes. The hierarchy is automatically updated when a parent is selected.
5. Adding Sub-Entities (Sites, Chargers, Drivers)
From the Site view:
Click Add, then choose:
Site: Create a subsite.
Charger: Link a new charger to the current site.
Driver: Add driver access scoped to this site.
Follow guided inputs to complete the action.
6. Adding a Charger
In a Site view, navigate to the Chargers tab.
Click Add Charger.
Fill in:
Charger ID (must match charger’s config)
Charger Name
Site (auto-filled from context)
After saving, update the charger’s endpoint to:
TEST environment | PROD environment | |
|---|---|---|
OCPP 1.6 | wss://ocpp.emabler.net/ocpp/ | wss://ocpp.emabler.io/ocpp/ |
OCPP 2.0.1 | wss://ocpp.emabler.net/ocpp/ | wss://ocpp2.emabler.io/ocpp/ |
Charger will connect automatically once configuration matches.
7. Configuration & Monitoring Tools
Each Site provides access to several utility tabs:
Dashboard: Displays charger statuses and activity
Chargers: List of all chargers under the site
Location: Edit geolocation and service info
Tools > Configuration Manager: Manage configuration for all chargers connected to that site
Tools > Socket Bulk Update: Bulk update of socket details for all chargers connected to the site
DLM (if enabled): Dynamic Load Management settings